Welcome back to another installment of EEK WEEKS! I cannot believe this is number six, and we only have two more fall/Halloween projects to go.
This week’s project was inspired by a pillow I bought a few years ago that says, “If the broom fits, ride it.” I was feeling a little witchy and needed some fun color to go with my stylish Halloween boxes, so I decided a witch’s broom would be the perfect addition to my Halloween decor.
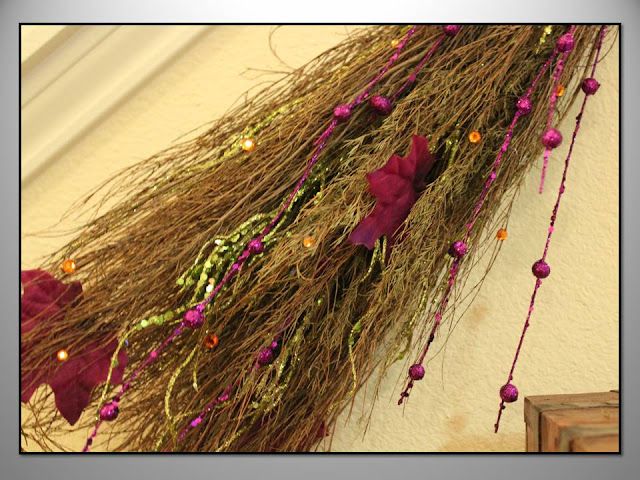
I started with a broom I found at Michael’s and added glittered lime green and purple branches, leaves, and rhinestones to the straw end of the broom. I wrapped stripy ribbon around the handle and hot glued a bow with some dangly witchy accouterments (eyes, skeleton hand, and tombstones) to the middle of the broom.

I hung the broom parallel to the staircase and accessorized with all things witchy including Halloween boxes, a black cat, a hand-drawn spider web, and a creepy little, old witch.
I was inspired by Jessica over at Craftily Ever After to create my own Halloween version of “Keep Calm and Carry On,” so I made “If the broom fits, ride it.” It’s the perfect finishing touch to this vignette.

I think this turned out so cute! I was kind of stuck in a Halloween decorating rut, and having this blog and doing EEK WEEKS has really forced me to think outside the box. I heart blogland! 🙂
Are you feeling a little witchy? Would you like the “If the broom fits” printable? Let me know; I’m happy to share! 🙂
This past week, Crafts & Sutch reached over 400 followers! I’m over the moon, so be on the lookout for a giveaway soon as my thank you to you! 🙂
Instructions for Making a Halloween Witch’s Broom
Materials Needed
- Broom
- Glittered lime green branches
- Glittered purple branches
- Glittered leaves
- Rhinestones
- Striped ribbon
- Hot glue gun
- Accessories (eyes, skeleton hand, tombstones)
- Halloween boxes for decoration
- Black cat decoration
- Spider web decoration
- An optional printable or banner
Prepare the Tulle
Gather your materials and lay out the tulle for a decorative touch along the broom if desired.
Create the Volume
Attach the glittery branches and leaves to the broom straw end to create volume and texture.
Prepare the Poly Satin Circles
If using additional decorations, prepare these in your preferred color scheme.
Layer the Components
Layer the glittered items on the broom, ensuring they stick well with hot glue.
Additional Personalization
Wrap the striped ribbon around the broom handle and create a bow for extra flair.
Attach the Clip-On Earring
If desired, add clip-on accessories like eyes, skeleton hands, or tombstones to bring a witchy vibe.
Prepare the Shoes
Consider coordinating your shoes with your broom for a full Halloween look.
Make Additional Pairs
Feel free to create more witch’s brooms in different colors for variety.
Enjoy Your Custom Creation
Once complete, hang your witch’s broom as a decoration and enjoy your creative Halloween spirit! Share your creation with friends and family.
Conclusion
This project not only adds a fun touch to your Halloween decorations but also allows you to express your personal style and creativity. Enjoy crafting and have fun sharing your custom creations with others!