The hubs thought TO DO Tuesday needed a better name. 🙂 Men. 🙂 I love our last name! Hence, Crafts & Sutch…so I thought this feature needed a “Sutchy” title and so Sutch an Inspiration was born! 🙂
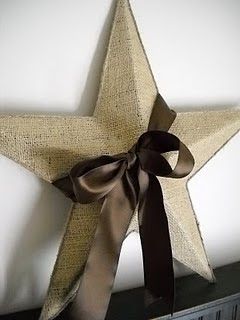
I so love this burlap star over at The Douglas Family! I know a ton of us have these stars all over our house, and this is an affordable way to jazz it up. The big, brown ribbon is the perfect finishing touch. LOVE!
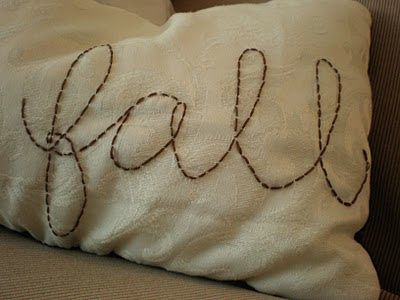
I adore this pillow Kasia made over at Dream Home! It really got me thinking that I need a pillow with “Sutch” embroidered on it for our master bedroom. 🙂 I love projects like this that are simple and can be adapted for EVERYTHING!
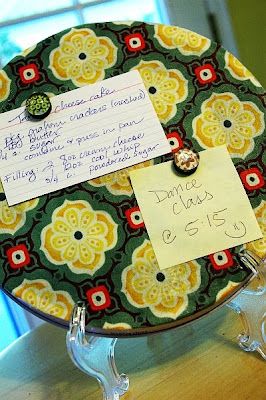
Megan over at Brassy Apple might be a genius! Isn’t this the cutest and most practical message board you’ve ever seen? Do you know what she made it from? A burner cover…from the dollar store…two for a dollar! Genius!
Calamity Anne shared this recipe for Orecchiette with Sausage and Roasted Red Peppers. It looks delish and seems simple enough even for me to try! 🙂 Did you know that orecchiette means little ears in Italian? Lots of pastas mean something fun in Italian! 🙂

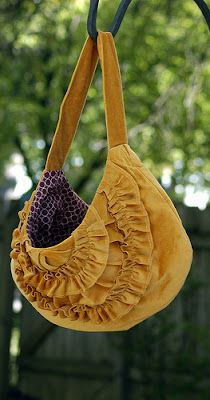
I instantly fell in love with this Anthropologie inspired bag that Emily made over at The Boy Trifecta! It’s a plush and lush golden velveteen bag adorned with rows of ruffles…kind of MY perfect bag for fall. If she sold this, I would buy it in an instant! 🙂
Ladies, thank you so much for sharing these ideas and recipes! 🙂 You are Sutch an inspiration! Please grab the featured button from the sidebar if you like!
Instructions for Making [Project Name]
- Burlap
- Fabric for the pillow
- Burner cover
- Satin fabric for the bag
- Thread and needle
- Scissors
- Hot glue gun
Prepare the Tulle:
Begin by cutting the tulle to your desired lengths for layering in your project.
Create the Volume:
Gather the tulle to create volume, making sure it is evenly distributed.
Prepare the Poly Satin Circles:
Cut out circles from the poly satin, which will serve as embellishments for your projects.
Layer the Components:
Stack the tulle, satin circles, and additional materials to achieve the desired look.
Additional Personalization:
Add embroidery or embellishments to customize your creation further.
Attach the Clip-On Earring:
Finish your project by attaching the clip-on earring securely to your design.
Prepare the Shoes:
If incorporating shoes in your project, ensure they are clean and ready for any additions.
Make Additional Pairs:
Don’t hesitate to create more pairs, experimenting with different colors and designs!
Enjoy Your Custom Creation:
Take a moment to appreciate your hard work and creativity. Share your designs with friends and family!
In conclusion, this project showcases the fun and creativity involved in expressing your personal style. Enjoy the journey of crafting and let your imagination run wild!