Hi there! Happy Monday! I hope you all had a wonderful weekend! Did you watch the game? I kind of listened to it while I was crafting. 🙂 The monkey has been sick all weekend and needed an extra dose of mommy time, so crafting went out the window until his bedtime. 🙂
I cannot tell you how much I have loved all of the comments from the How to Add a Hyperlink in a Comment post!!! I am visiting everyone’s blog, and am meeting so many new friends. If I haven’t made it to yours yet, don’t worry…I’ll be there soon! I just haven’t had a whole lot of computer time since Kason’s been under the weather.
One friend I met is Allison from Thrifty Crafting!
As I was poking around her blog, I found so many cute things. Allison seriously is the queen of thrifty crafting! Take a peek at some of her awesome projects…
How cute is this Upcycled Dinosaur T-shirt? Allison made it from a too small long sleeve shirt and a white shirt that had a stain on it…mix the two together and you end up with this custom T for your cutie.
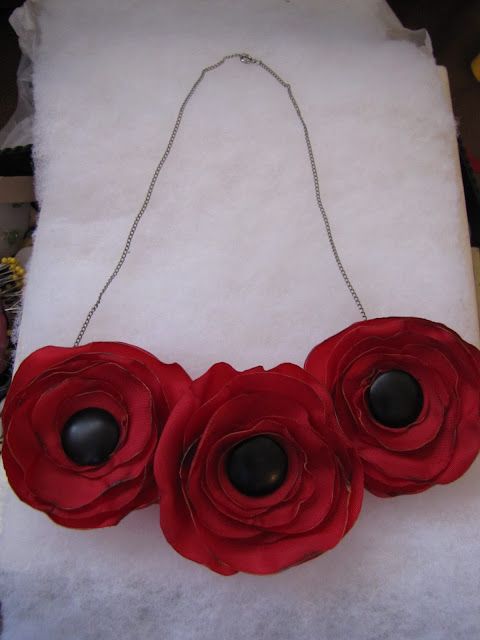
Hello, Gorgeous! I LOVE this Poppy Bib Necklace! …and I would love to have one too! Allison gives a great tutorial on how to make these poppy-like buds.
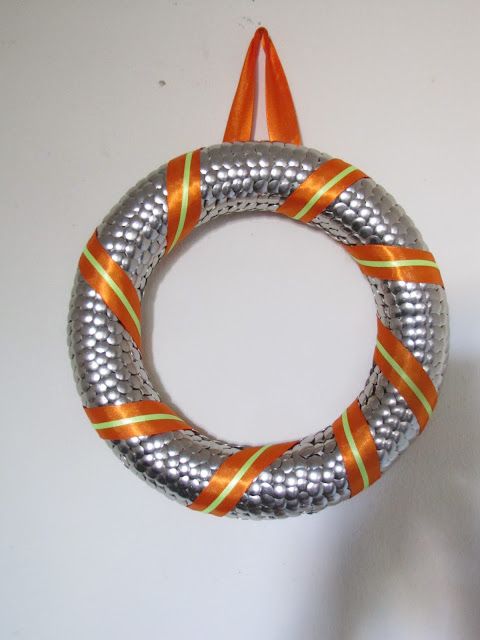
I’m all about the industrial, hammered nail look of this $1.00 Store Thumbtack Wreath! How very clever and you could easily change out the ribbon with the seasons or add a few pretty rosettes for the spring.
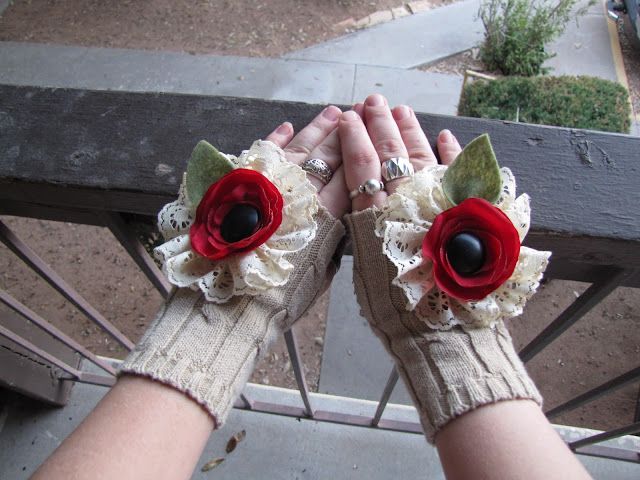
These Flower Brooch Fingerless Gloves are so feminine and pretty! I love how Allison attached brooches to these gloves so they could easily be removed and popped onto a jacket or bag.
As I continued roaming her blog, I found out that she wasn’t loving her current blog design, so I swooped in to save the day! 🙂
I sure hope you’ll stop by Thrifty Crafting to take a look at her new digs and tell her hello! She would love that…and so would I!
Have a great week! See you tomorrow for SUTCH an Inspiration!
Instructions for Making Custom Clip-On Earrings
Materials Needed
- Tulle fabric
- Poly satin fabric
- Clip-on earring base
- Scissors
- Needle and thread
- Decorative elements (such as beads or fabric flowers)
Steps
- Prepare the Tulle: Cut the tulle into strips, approximately 2 inches wide and about 12 inches long for good volume.
- Create the Volume: Gather the tulle strips and tie them together in the middle. Fluff them to give a fuller appearance.
- Prepare the Poly Satin Circles: Cut out circles from the poly satin fabric that are about 3 inches in diameter.
- Layer the Components: Place the satin circle on a flat surface and add the tulle bundle on top of it. Secure them together with a needle and thread.
- Additional Personalization: Add decorative elements like beads or fabric flowers for a personalized touch.
- Attach the Clip-On Earring: Sew the completed tulle and satin combination onto the clip-on earring base.
- Prepare the Shoes: If you have matching shoes, consider adding the same decorative elements for cohesion.
- Make Additional Pairs: Repeat the process to create more pairs of earrings in various colors and styles.
- Enjoy Your Custom Creation: Wear your beautiful earrings with pride and share your unique style with friends!
Conclusion
This project is a fantastic way to express your creativity and personal style. Have fun crafting, and don’t forget to share your beautiful creations with others!